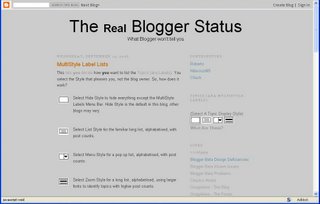
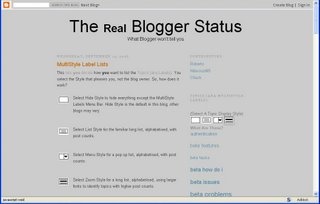
This lets you decide how you want to list your BlogRoll. You select the LinkList view that pleases you, not the blog owner. So, how does it work?
LinkList Hidden
Here you see no linklist.
LinkList Shown
Here you see the linklist, as you would normally do.
(Question): This rocks! So, Chuck, how do I get this into my blog? For the answer, see Adding CumulusLinkList Code Into Your Blog.
Cumulus Blogs
Inspiring the BlogOSphere
Available Language Options - 54
Monday, December 11, 2006
Customising Multiple LinkLists
Each LinkList in your blog will have a unique number. You must replace the default record
with the code for that LinkList. For instance
The Cumulus HiddenLinkList code, as provided, can replace LinkList1 thru LinkList7, without modification. Simply select as appropriate.
If you have a linklist in the blog, other than Linklist1 thru LinkList7, you'll have to download LinkList1, then edit the code, in 9 locations, as shown below. In other words, if you're looking to hide Linklist17, change all 9 instances of 1 to 17.
Note that this code is provided for example only, and is liberally seeded with gratuitous line breaks, to prevent display problems. Always start with proper downloaded code.
To prevent problems, change all 9 "1" identically, to match the existing "<b:widget id='LinkList..." widget.
<b:widget id='LinkList ... type='LinkList'/>
with the code for that LinkList. For instance
<b:widget id='LinkList3' ... type='LinkList'/>must be replaced with the correct code for LinkList3.
The Cumulus HiddenLinkList code, as provided, can replace LinkList1 thru LinkList7, without modification. Simply select as appropriate.
- Right click, on the appropriate link.
- Choose Save Link As...
- Save as desired into a text file.
If you have a linklist in the blog, other than Linklist1 thru LinkList7, you'll have to download LinkList1, then edit the code, in 9 locations, as shown below. In other words, if you're looking to hide Linklist17, change all 9 instances of 1 to 17.
Note that this code is provided for example only, and is liberally seeded with gratuitous line breaks, to prevent display problems. Always start with proper downloaded code.
To prevent problems, change all 9 "1" identically, to match the existing "<b:widget id='LinkList..." widget.
<b:widget id='LinkList1' locked='false' title='Links' type='LinkList'>
<b:includable id='main'>
<b:if cond='data:title'>
<h2><data:title/></h2>
</b:if>
(Select To Hide or Show Linklist)<br/>
<a href='javascript:void' onclick='javascript:hideLinklist1();
' title='Switch to Hidden Linklist'>
<img src='http://photos1.blogger.com/blogger2/
5761/839511333942044/1600/Label%20Hide%20Style.jpg'/></a>
<a href='javascript:void' onclick='javascript:showLinklist1();
' title='Switch to Visible Linklist'>
<img src='http://photos1.blogger.com/blogger2/
5761/839511333942044/1600/Label%20List%20Style.jpg'/></a>
<b><a href='http://cumulusblogs.blogspot.com/2006/12/
cumulus-linklist-how-does-it-work.html'>What Are These Boxes?</a></b>
<div class='widget-content'>
<div id='LinkListDisplay1'>
</div>
</div>
<script language='javascript' type='text/javascript'>
function showLinklist1() {
var display = "<ul>";
<b:loop values='data:links' var='link'>
display = display + "
<li><a expr:href='data:link.target'>
<data:link.name/></a></li>";
</b:loop>
display = display + "</ul>";
obj = document.getElementById('LinkListDisplay1');
obj.innerHTML = display;
}
function hideLinklist1() {
var display = "";
obj = document.getElementById('LinkListDisplay1');
obj.innerHTML = display;
}
// set default to Hidden Linklist
hideLinklist1();
</script>
<b:include name='quickedit'/>
</b:includable>
</b:widget>
Adding CumulusLinkList Code Into Your Blog
This is simpler than it looks. Just go one step at a time.
(Note): Do not omit either step 5 or 9 at any time - always backup the template, before and after doing this. Template backups are exceedingly small. If your disk space is so tight that you can't store half a dozen duplicate copies of your template, it's best that you not use Cumulus Linklists. Better safe than sorry.
(Note): Do not omit either step 5 or 9 at any time - always backup the template, before and after doing this. Template backups are exceedingly small. If your disk space is so tight that you can't store half a dozen duplicate copies of your template, it's best that you not use Cumulus Linklists. Better safe than sorry.
- Sign on as an adminstrator, to your blog.
- Select "Customize".
- You can have multiple LinkList page elements, and hide whichever ones you wish. Go to Page Elements. For each linklist that you wish to hide, edit its page element, and give it a distinctive title. This will let you easily identify its template HTML entry.
- From Template, select "Edit HTML".
- Backup your template, before proceeding.
- Edit the template. Do not select "Expand Widget Templates". Find each record
<b:widget ... title='?????' type='LinkList' />
where "?????" = the titles given in the above step. See Customising Multiple LinkLists, extract the correct HiddenLinkList text file, and replace each widget record, carefully, one at a time, with the extracted code. - Save Template, then View Blog.
- Test the new linklist.
- When you are satisfied, Backup your template, again, preferably to a new file (save the previous backup too).
- Note: Cumulus LinkList code is data sensitive. If you setup the code and carefully check the element numbers (for uniqueness and for consistency), and with links defined in the list, you hit the List Open button and nothing happens, examine each link in the linklist, using the Page Elements link widget. Very long link labels and / or link labels with special characters may make the code inoperable.
Friday, September 15, 2006
Adding CumulusTopics Code Into Your Blog
This is simpler than it looks. Just go one step at a time.
(Note): Do not omit either step 6 or 12 at any time - always backup the template, before and after doing this. Template backups are exceedingly small. If your disk space is so tight that you can't store half a dozen duplicate copies of your template, it's best that you not use Cumulus Topics. Better safe than sorry.
(Note): Do not omit either step 6 or 12 at any time - always backup the template, before and after doing this. Template backups are exceedingly small. If your disk space is so tight that you can't store half a dozen duplicate copies of your template, it's best that you not use Cumulus Topics. Better safe than sorry.
- Download the MultiStyle Labels text. If you downloaded the text yesterday, do it again today. Always get a fresh copy.
- Right click.
- Choose Save Link As...
- Save as desired into a text file.
- If you like the multi-style concept, but don't want all of the selections, and are handy with coding, you are welcome to customise the menu bar yourself. You can remove any of the menu buttons, for a cleaner look and less selections, if you like. You can also change the default selection. It's your blog.
- Sign on as an adminstrator, to your blog.
- Select "Customize".
- You can only have one Labels page element. If a Labels page element is present, leave it. If not, add one. Position the Labels page element as desired.
- From Template, select "Edit HTML".
- Backup your template, before proceeding.
- Edit the template. Do not select "Expand Widget Templates". Look in the template code, and find the record
<b:widget id='Label1' ... type='Label' />
- Copy and Paste the complete contents of the text file just downloaded, into the template code, replacing the Label1 record.
- Save Template, then View Blog.
- Test the 4 styles offered in the MultiStyle Labels Menu Bar.
- Instructions on customising the installation are being developed. You can customise the captions in the label code, as desired.
- When you are satisfied, Backup your template, again, preferably to a new file (save the previous backup too).
CumulusTopics - How Does It Work?
This lets you decide how you want to list the Topics (aka Labels). You select the Style that pleases you, not the blog owner. So, how does it work?
Hide
 Select Hide Style to hide everything except the MultiStyle Labels Menu Bar. Hide Style is the default in this blog; other blogs may vary.
List
 Select List Style for the familiar long list, alphabetised, with post counts.
Menu
 Select Menu Style for a pop up list, alphabetised, with post counts.
Zoom
 Select Zoom Style for a long list, alphabetised, using larger fonts to identify topics with higher post counts.
Original code by Ramani of HackOSphere, modified by Chuck of RBS.
(Question): This rocks! So, Chuck, how do I get this into my blog? For the answer, see Adding CumulusTopics Code Into Your Blog.
Subscribe to:
Posts (Atom)


